How to install an eSIM on Android - complete guide
You have an Android phone and want to install an eSIM for your trip? The process is surprisingly simple, although it may vary slightly depending on your phone manufacturer. Whether you have a Samsung Galaxy, Google Pixel, Xiaomi or another popular brand, eSIM installation takes just a few seconds.
Unlike iPhone, where the interface is uniform, on Android each manufacturer has its own interface (Samsung One UI, Google Pixel UI, MIUI on Xiaomi, etc.). In this guide, we show you exactly how to install eSIM on the most popular Android phones, with specific instructions for each brand.
What you'll learn in this guide:
- Checking Android phone compatibility with eSIM
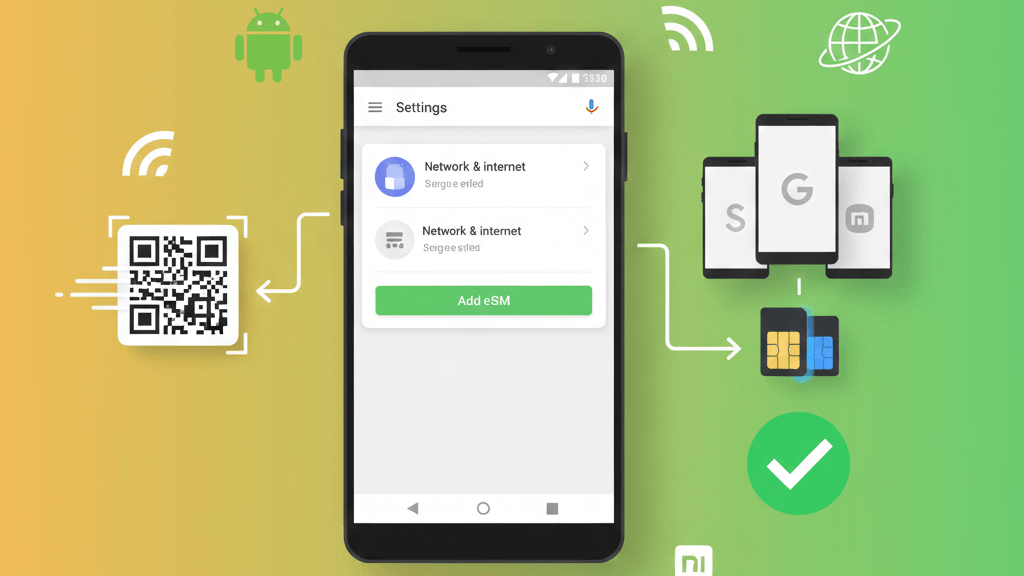
- Installing eSIM by scanning QR code (primary method)
- Specific instructions for Samsung Galaxy
- Specific instructions for Google Pixel
- Instructions for Xiaomi, Oppo and other brands
- Setting up Dual SIM on Android
- Solving common problems
Which Android phones support eSIM?
Not all Android phones have eSIM support. Here's a list of the most popular compatible models:
Samsung Galaxy (One UI)
- S24 Series: S24 Ultra, S24+, S24
- S23 Series: S23 Ultra, S23+, S23, S23 FE
- S22 Series: S22 Ultra, S22+, S22
- S21 Series: S21 Ultra, S21+, S21, S21 FE
- S20 Series: S20 Ultra, S20+, S20, S20 FE
- Fold Series: Z Fold 5, Z Fold 4, Z Fold 3, Z Fold 2
- Flip Series: Z Flip 5, Z Flip 4, Z Flip 3
Google Pixel
- Pixel 8 Series: Pixel 8 Pro, Pixel 8, Pixel 8a
- Pixel 7 Series: Pixel 7 Pro, Pixel 7, Pixel 7a
- Pixel 6 Series: Pixel 6 Pro, Pixel 6, Pixel 6a
- Pixel 5 Series: Pixel 5, Pixel 5a
- Pixel 4 Series: Pixel 4, Pixel 4a, Pixel 4 XL
- Pixel Fold Series: Pixel Fold (all versions)
Xiaomi (MIUI/HyperOS)
- Xiaomi 14 Pro, 14, 14 Ultra
- Xiaomi 13 Pro, 13, 13 Lite, 13T Pro
- Xiaomi 12T Pro, 12 Pro
Oppo
- Oppo Find X5 Pro, Find X5
- Oppo Find X3 Pro
- Oppo Reno 6 Pro 5G, Reno 5A
Motorola
- Motorola Razr (2023, 2022, 2020, 2019)
- Motorola Edge+ (2023, 2022)
- Motorola Edge 40 Pro
Other brands
- OnePlus: OnePlus 11, OnePlus Open
- Sony: Xperia 1 V, Xperia 5 V, Xperia 10 V
- Honor: Magic 5 Pro, Magic 4 Pro
How to check compatibility
Method 1 - Check in settings:
- Open Settings
- Look for Connections or Network & internet
- Look for SIM manager or SIM card manager
- If you see the option Add mobile data plans or Add eSIM, your phone supports eSIM
Method 2 - Check IMEI code:
- Dial *#06# on your phone
- If you see an EID code (32 digits), your phone supports eSIM
What you need before you start
For a smooth installation, prepare the following:
1. Compatible and unlocked phone
Verify that your phone is on the list above and is network unlocked. If you bought it directly from the manufacturer or it's older than 2 years, it's probably already unlocked.
2. Stable internet connection
You need WiFi or mobile data to download the eSIM profile. We recommend WiFi for a more stable installation.
3. Activation QR code
After purchasing an eSIM plan (for example from beeSIM), you instantly receive via email:
- Unique QR code for activation
- Installation instructions
- Confirmation code (if necessary)
Pro tip: Display the QR code on another device (laptop, tablet, another phone) or print it. You can't scan a QR code from the same phone where you want to install the eSIM!
4. Sufficient battery
Make sure you have at least 30% battery to avoid interrupting the installation process.
Installing eSIM on Samsung Galaxy (One UI)
Samsung phones use the One UI interface, which makes the eSIM installation process quite intuitive. Here are the complete steps:
Step 1: Access SIM settings
- Open the Settings app
- Tap on Connections
- Tap on SIM card manager
- Tap on Add mobile plan or Add eSIM plan
Step 2: Scan the QR code
- Select Scan QR code
- Grant camera access permission if requested
- Position the QR code in front of the camera
- The phone will automatically detect the code and display plan details
Step 3: Confirm installation
- Verify the displayed information (carrier, validity)
- Tap Add or Confirm
- Enter the confirmation code if requested
- Wait a few seconds for the profile to download
Step 4: Activate the eSIM
- After installation, you'll see the new eSIM plan in the SIM list
- Tap on the eSIM plan
- Toggle the switch to turn it on
- Enable Data roaming (very important!)
Manual installation (without QR code)
If you can't scan the QR code, Samsung also allows manual entry:
- Instead of "Scan QR code", select Enter activation code
- Fill in:
- SM-DP+ address
- Activation code
- Confirmation code (optional)
- Tap Add
Installing eSIM on Google Pixel
Google Pixel phones have stock Android (the purest), which makes the process very simple and straightforward:
Step 1: Access network settings
- Open Settings
- Tap on Network & internet
- Tap on SIMs
- Tap on Add carrier (+ button)
Step 2: Select installation method
Google Pixel offers multiple options:
- Scan a QR code - recommended method
- Enter manually - if you have activation details
- Download from carrier app - if carrier offers it
Step 3: Scan the QR code
- Select Scan a QR code
- Grant camera access
- Position the QR code in frame
- Detection is automatic
Step 4: Configure the eSIM
- After scanning, you'll see carrier information
- Tap Download
- Wait a few seconds for installation
- When "Completed" appears, tap Done
Step 5: Activate services
- Return to Settings → Network & internet → SIMs
- Tap on the new eSIM
- Enable Use SIM
- Enable Mobile data roaming
Installing eSIM on other Android brands
Xiaomi (MIUI / HyperOS)
- Settings → SIM cards & mobile networks
- Add an eSIM plan
- Scan QR code or enter details manually
- Confirm and enable Data roaming
MIUI note: On some Xiaomi phones, the option is called "Virtual SIM" instead of "eSIM".
Oppo (ColorOS)
- Settings → SIM cards & mobile data
- Add eSIM
- Scan QR code
- Follow on-screen instructions
- Activate plan and Data roaming
Motorola
- Settings → Network & internet
- SIMs
- Add carrier
- Scan QR or enter manually
- Confirm and activate
OnePlus (OxygenOS)
- Settings → WiFi & Internet
- SIM cards
- Download a SIM
- Scan QR code
- Activate plan
Can't find the option?
If you can't find the eSIM adding option in settings:
- Double-check phone compatibility
- Make sure you have the latest Android version installed
- Verify the phone is network unlocked
- Search in Settings for terms like "eSIM", "Virtual SIM", "Mobile data plan"
Setting up Dual SIM on Android
Most modern Android phones support Dual SIM, allowing you to use your primary SIM and travel eSIM simultaneously. Here's how to configure everything correctly:
Labeling SIMs
After installing the eSIM, the phone will ask you to label the two SIMs. For example:
- SIM 1 (physical): "Personal" or "Home"
- SIM 2 (eSIM): "Travel" or country name (e.g., "Turkey")
Setting for mobile data
Samsung Galaxy:
- Settings → Connections → SIM card manager
- Tap on Mobile data
- Select travel eSIM
Google Pixel:
- Settings → Network & internet → SIMs
- Under "Mobile data", select eSIM
Xiaomi:
- Settings → SIM cards & mobile networks
- Tap on Mobile data
- Select eSIM
Setting for calls and messages
To remain accessible on your usual number, set your primary SIM for calls:
- Find the Calls or Preferred line option
- Select your home physical SIM
- Same for SMS
Data roaming - VERY IMPORTANT!
Enable Roaming ONLY for eSIM, not for your home SIM:
| SIM | Mobile data | Data roaming | Calls |
|---|---|---|---|
| Physical SIM (home) | ❌ Disabled | ❌ Disabled | ✅ Enabled |
| eSIM (travel) | ✅ Enabled | ✅ Enabled | ❌ Disabled (or enabled if plan includes calls) |
This way, you'll use internet from eSIM (no roaming charges), but remain accessible for calls on your home number.
Common problems and solutions
Can't find eSIM adding option in settings
Possible causes:
- Phone doesn't support eSIM - check compatibility list
- Phone is network locked - contact carrier for unlocking
- Android version too old - update to latest available version
- Manufacturer's interface hides option - search for "Virtual SIM" or "Mobile data plan"
eSIM won't activate or gets stuck
Solutions:
- Check internet connection (WiFi or mobile data)
- Restart phone and try again
- Make sure phone is network unlocked
- Wait a few minutes - sometimes carrier servers are busy
- Contact beeSIM support for verification
"Error adding plan" or "Invalid QR code"
Causes and solutions:
- QR code already used - each QR code can only be installed once. Contact carrier for new code.
- QR not scanning correctly - enlarge QR image, increase screen brightness where displaying it, or try manual entry.
- Incorrect data in manual entry - verify you copied exactly the SM-DP+ address and activation code.
I installed eSIM but have no signal
Checks:
- Activate eSIM from SIM settings (switch ON)
- Enable Data roaming for eSIM
- Toggle Airplane mode on and off for reconnection
- Manually select network operator:
- Settings → Connections/Network → Network operators
- Search available networks
- Manually select an operator from list
- Verify you have coverage in your area (see plan specifications)
Internet is very slow or unstable
Solutions:
- Check APN (Access Point Name) settings - usually configured automatically, but you can request carrier details if needed
- Force 4G/5G connection:
- Settings → Connections/Network → Mobile networks
- Network mode → Select LTE/5G
- Try in a different location - you might be in a weak signal area
- Restart phone
I accidentally deleted the eSIM
Once deleted, an eSIM cannot be reinstalled with the same QR code. Contact beeSIM and we'll help with:
- Transfer to new profile (if plan is still valid)
- Generate new QR code
eSIM works but can't receive calls on primary SIM
Solution:
- Verify primary SIM is enabled in settings
- Some phones automatically disable one SIM when installing another - reactivate it
- Make sure you have signal on both SIMs
Ready to travel connected on your next trip?
Installing an eSIM on Android is a simple process that takes just a few seconds, whether you have Samsung, Google Pixel or another popular brand. It gives you the freedom to be connected anywhere in the world without roaming charges and without searching for SIM card stores.
Although each manufacturer has its own interface, the basic process remains the same: scan a QR code, confirm installation and you're ready to go. With Dual SIM support on most modern phones, you can keep your home number active for calls while using eSIM internet abroad.
What's next? If you don't have an eSIM plan for your trip yet, explore beeSIM plans for over 180 countries, with instant activation and support in your language.