How to install beeSIM eSIM on Apple devices?
Follow our step-by-step guide to easily install your eSIM on Apple devices.
Overview
This guide helps you install your eSIM on Apple iPhone or iPad devices. We recommend the QR code method for a quick setup.
Before you start, make sure your phone supports eSIM, isn't locked to a specific network, and is connected to the internet via Wi-Fi or mobile data.
Steps
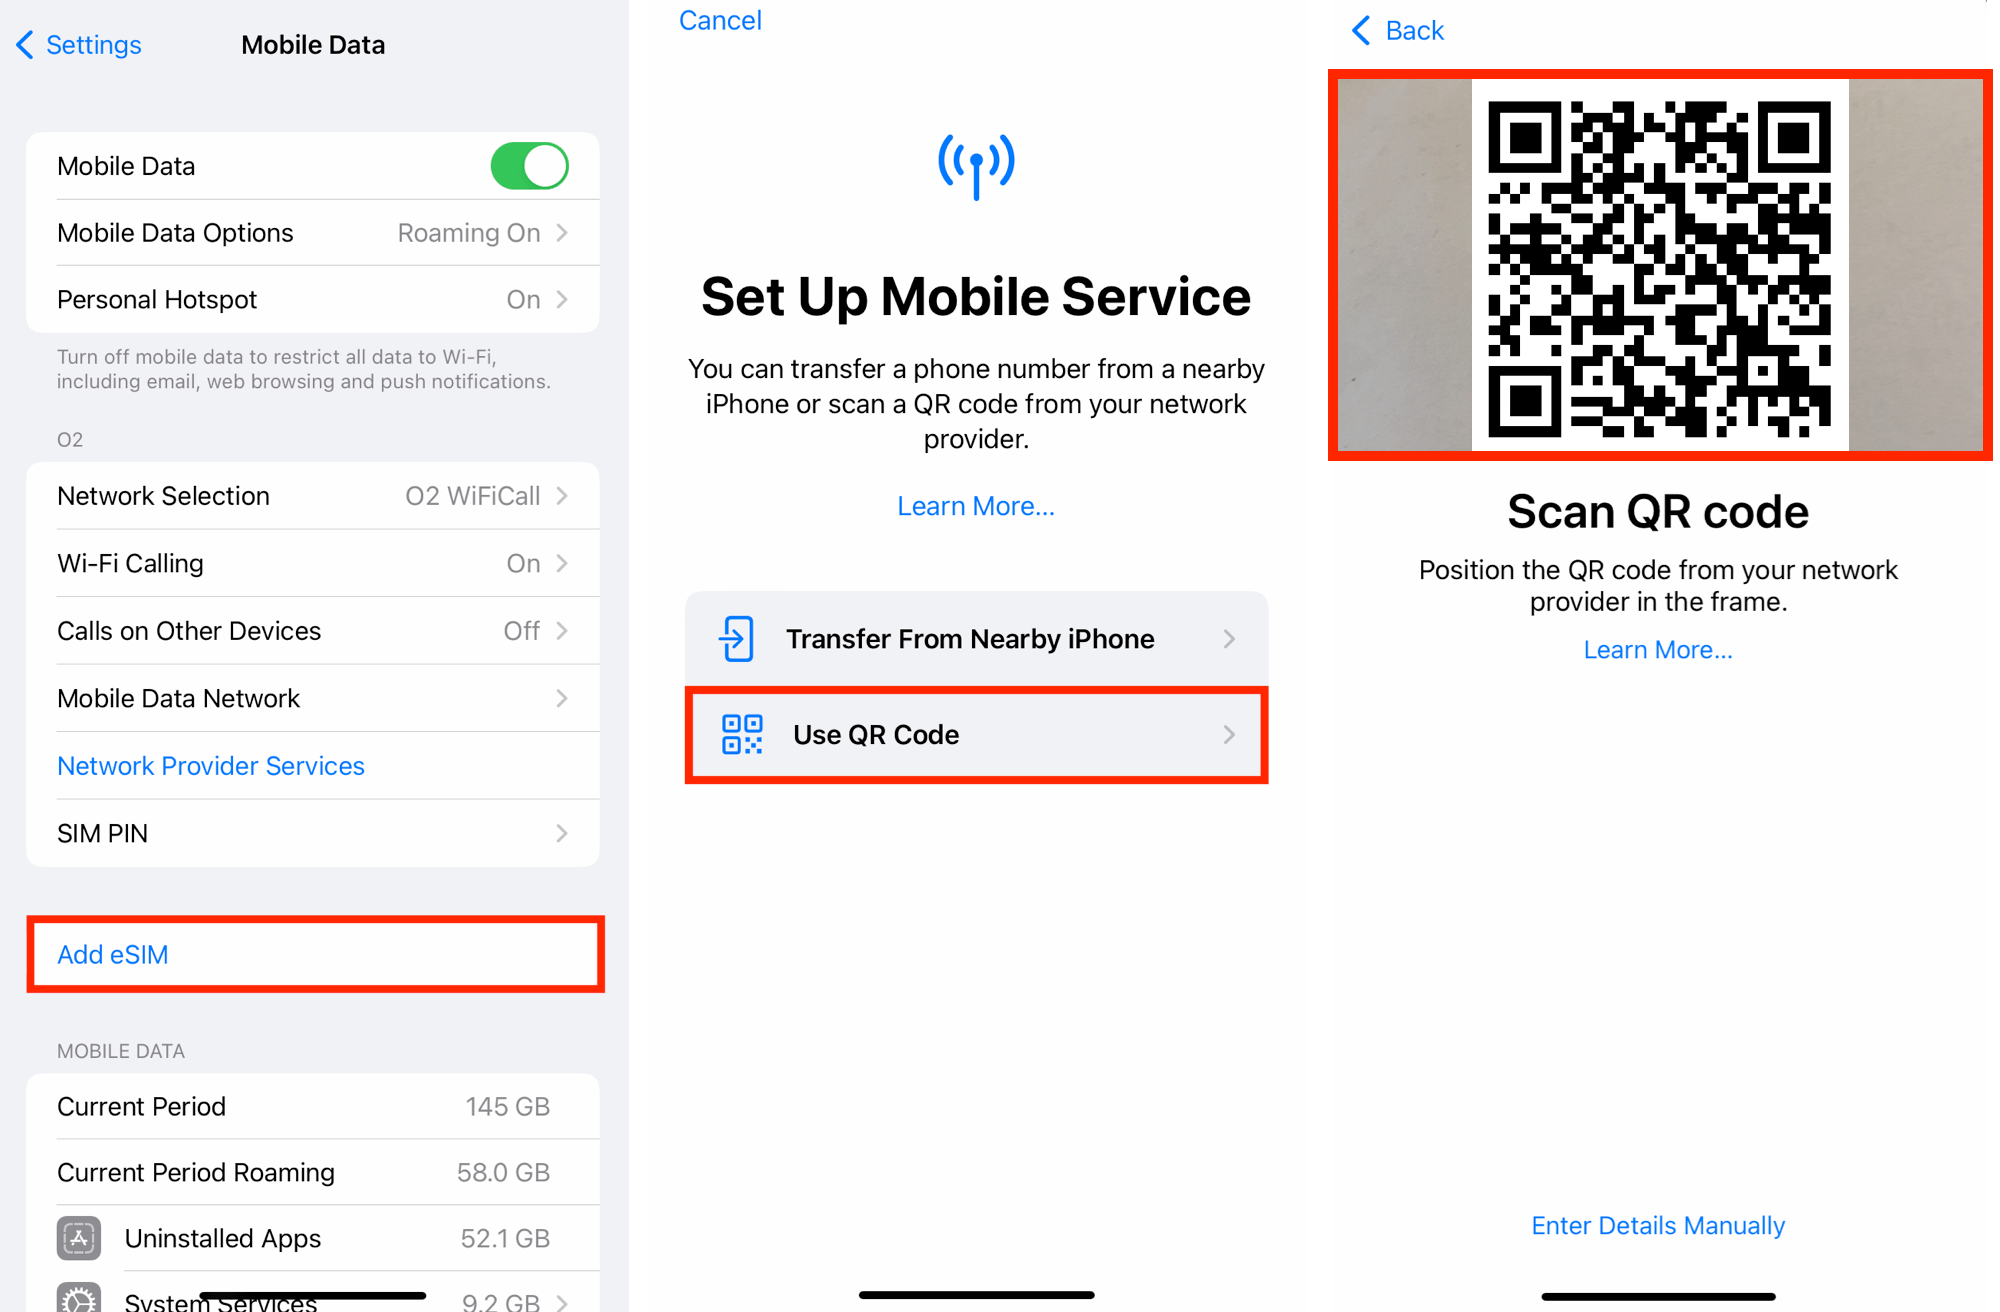
Step 1. Scan the QR code
There are two options to scan the QR code:
- Option 1: Open the Camera app → Scan the QR code → Tap “Mobile Plan”.
- Option 2: Go to Settings → Mobile / Cellular Data → Add eSIM → Use QR Code → Scan the QR code provided.
Step 2. Confirm and activate
Tap “Continue”, wait for the eSIM to activate, then tap “Done”.
Step 3. Label your eSIM (optional)
You can rename your eSIM for easy identification (for example, “beeSIM Data”).
Step 4. Configure settings
- Set Default Line to “Primary” and tap Continue.
- Set iMessage & FaceTime to “Primary” and tap Continue.
- Set Mobile Data to your new eSIM (e.g., “beeSIM Data”).
- Decide if you want “Allow Mobile Data Switching” enabled.
Step 5. Enable Data Roaming
Go to Settings → Mobile / Cellular Data → Select your new eSIM → Turn on Data Roaming.
Tip: Restart your device if mobile data doesn’t connect immediately.
After installation
- Restart your device if prompted.
- Make sure Mobile Data is enabled for the new eSIM.
- Enjoy instant connectivity with beeSIM!